Sunday, February 27, 2022

Gallery of pop up cards

 These are popup and interactive cards which I have made in the past there is a picture of the front and the inside of the card. You can go through the gallery and the other links and pick out a different front for your card but use a particular inside. I have tried to group all of the same pop ups together regardless of what theme they are. You will also find them in the gallery for their theme for eg if its a birthday themed pop up then you will find it in the gallery of birthday cards and the gallery of pop up cards - i hope that makes sense.

You can also choose a particular interactive or pop up and then ask for a front ive never made before. Just email me on erinmckenziechristensen@gmail.com and ask for what you would like - choose the label against the pop up it will likely have a name example katherine label pop up and say i would like that on the inside but i would like it to be cat themed and be a birthday card and i will try to make a custom card for you based on your requests! I do not keep many pop up or interactive cards in stock primarily because they take me ages to make and by doing requests for cards im selling what i am making and not holding lots in stock.

Please also not whether i take on a project or not totally depends on my health as i always put that first! Sometimes there maybe other cards which have been booked for months its kinda a first in first served type basis..

Also i suggest if you need the card posted then please allow a few weeks to make the card PLUS the postage time which will depend on where you live of course. I can also send them direct to the recipient and write in the card on your behalf- some people prefer this method others want to hand deliver them or see the card first which is totally fine. Also note that i do not charge above what australia post charges me whatever they say is the cost is how much i charge- i often post them in a CD mailer box so they are  a package but this keeps the card straight and not bent and keeps it safe.

If you have any questions at all please do not hesitate to contact me!


Thursday, February 17, 2022

Gallery of birthday cards

 These cards are cards i have made in the past. They are examples of what i have made. You can pick a different inside to outside (for example if the card has a pop up inside you can choose what to have on the front and then choose what pop up to have on the inside).

Friday, June 18, 2021

Bee Mine Valentines day card

Awhile I made this bee Valentine's day card. It was extremely popular - I ended up making it in the form of a bee mine (valentine's day card) a mother's day card - have a beeeautiful day and then I made a 2nd Valentine's day card for someone else to give to their partner! It is uncommon for me to sell duplicates of cards as I love coming up with new designs each time but some cards have been extremely popular and people have asked me to make the same design again which I have done!

On the front of the card I used Joset designs (Elizabeth craft designs) bee and beehive and i used karen burniston's outdoor edges for the grass. I cut a label and stamped bee mine in red ink and the bee in black ink from karen burnistons bee sentiments stamp set (Elizabeth craft designs, retired). I used pattern paper for the cloud background and polka dots for the grass from my stash.

On the inside of the card I cut one piece of the same cloud paper for the wall and I used a blue patterned paper for the floor of the card I joined them together and stuck the paper to white thick card stock so that the pop up would work I find paper is not thick enough. So there is an inside piece which is white with the paper stuck to it and the lots of pops die is placed on the fold and cut. I didnt need the two side "pops" so I didnt push them out. This die is discontinued however there are a few companies who have come out with "general pop up" dies with all different sizes I know stampendous, lawn fawn and Elizabeth craft designs have these sets and they are extremely useful because you can pop up just about anythig with them! There is also a second card which is the outside card base, I have found it best to use a thicker card stock on the inside around 270gsm/100 pound and a thinner cardstock on the outside card base closer to 210gsm I often do the inside 6mm/1/4 inch smaller all the way around on the inside but sometimes i make them the same size. When you make the pop up card after you have cut the pop up in this case the lots of pops die on the fold of the card, then you get the outside card base and stick it to the inside card base. It is best to do one side first and then the other and to use a good strong double sided tape. I prefer to use either Elizabeth craft designs tape or sookwang (be creative) tape as it is very strong.

On the top pop up part I put a bee hive and on the lower part I put a rectangle which had sticker saying "happy valentines day". I coloured the sticker red using a sharpie marker. I add a bee on the bee hive and on the floor of the card I put a label for somewhere to write my message and then I added 3 bees around it I stamped 1 love you and xoxo (from general sentiments, Elizabeth craft designs) and cut it out in a rectangle. From the beehive set i cut 5 flowers and coloured them red then I used yellow nuvo drops to make a centre to the flower.

Products used in this card - outer card base is approx 6 x 5 inches (roughly, I cannot recall the exact sizing but that is the beauty of these dies you can choose the card base size to whatever you want it to be, was one of the things that made me like these pop up dies because some brands restrict the size to just one size! The only thing you are restricted by is how big the pop up and what you are popping up are as long as they fit you can do it whatever size you want.

Dies karen burniston (ECD, retired) outdoor edges, lots of pops, Joset designs (Elizabeth craft designs) Bee, Beehive (including the flower from the beehive)

stamps bee sentiments (karen burniston, ECD retired, General sentiments - ECD Elizabeth craft designs)

Paper white cardstock, pattern paper from stash

other - yellow nuvo drops, peel off sticker-happy valentines day

Gift tags

 coming soon!

Monday, December 7, 2020

About Erin's cards and crafts

 My name is Erin Mckenzie-christensen I set up Erin's cards and crafts as a way to sell my cards (and other crafty things) to raise money for two charities. One of them is called Mito wishes upon a star and is in the US. The other is Bridges and Pathways Institute SA.

Mito wishes upon a star started out doing christmas wishes for children diagnosed with mitochondrial disease as like a secret santa. But now they have joined with Mito action who are doing this instead. Now mito wish upon a star are making parent pamper packs for parents who spend a long time in hospital with their sick kids and theyre doing birthday presents for the children. I will specifically be making the cards that will be sent to the US and when birthday presents or pamper packs are given out they will also receive a handmade card too! 

To pay for the postage to get the cards to the US (i reckon i will send at least 20 cards at a time or more) I will sell my cards and all of the profit above the cost to make it will go either to the postage for mito wish upon a star or to bridges and pathways institute.

I am specifically donating money to bridges and pathways which is a not for profit charity in Adelaide, South Australia where i live. They do many things, one of them is research into chronic conditions such as ME/CFS, MCS and connected conditions. They have established a clinic where the research is happening and this research includes but is not limited to mitochdondrial function in CFS/ME patients. I live with ME/CFS, MCS and other disabilities so this research is incredibly important to me and that is why all of the profits above the cost of making my cards are directly donated to bridges and pathways and mito wish upon a star.

To find out more about bridges and pathways please visit their website https://bridgesandpathways.org.au/

If you would like to order a card you can contact me erinmckenziechristensen@gmail.com. Please browse the cards for sale page where you will find posts containing all of the cards that i currently have for sale - as these are sold more cards will be put up on the blog. Find more information about how to order a card on the cards for sale menu

I also do tutorials showing how i made my cards and will be putting up some pictures of recent cards as well. I am hoping to have my you tube channel up and running soon.


Birthday cards for sale

These are the birthday cards that i currently have finished for sale prices as marked and are in Australian dollars.

I have the ability to add a happy birthday pop up to cards that are vertical or to horizontal cards that are  a certain size or bigger. There are two options for horizontal cards depending on size of the card if you would like the pop up added this will cost an extra $2.50 so if the card is marked as $5 then with a pop up it will cost $7.50. this does not include postage. i can post it anywhere in the world. i can find out the postage if you would like me to. i only have ONE of each card. some cards are not repeatable meaning i am not able to make them again. Once they have been sold i will mark this next to the card. I am going to leave the pictures up so that people can see the cards i have made or to get ides about what i can make.

I have a category for micellaneous cards and some of these do not have any sentiment on them and you can add pretty much whatever you like i have many sentiments - sentiments are the words on the card for example happy birthday or merry christmas is a sentiment. can also computer generate a sentiment for the front of the card. You may find more cards that could be birthday cards in this category 

Inside of the card so far all of these cards is blank but (for no extra than what is marked) i will add any sentiment of your choosing. i have stickers, stamps or can computer generate a sentiment. 

Please note i make special cards which are pre order meaning you email and say i would like  a cat birthday card with a cake pop up or a happy birthday pop up i like bright colours. Thats an example. I can give you a price for what you are asking for and then we go from there. these cards are not in stock though and depending on my health and how many other orders have been placed it may take 4 to 6 weeks for me to make or it may take 2 it really depends how busy i am! So my preference is to be asked as far in advance as possible that way if something unforseen happens and life gets in the way i am not disappointing a customer! I much prefer to have more time on a card.

If a card says OUT OF STOCK but it also says that it is repeatable please send me an email or message me on facebook as I should be able to make another card HOWEVER it may take awhile to make another card depending on how many other orders are currently on the go. 


This card is $7.50 number B1 likely unrepeatable - would need to check. OUT OF STOCK


This card is $5 B2 I have other bear paper toles but not this exact picture.

This card is $5 repeatable B3 OUT OF STOCK

This card is $5 and i think its unrepeatable i do have lots of paper tole pictures though  B4

This card is $5 and is unrepeatable.B5


this card is $5 and is unrepeatable  B6 OUT OF STOCK

this card is $5 and is unrepeatable B7

this card is $5 and i need to check if i can make the same again B8

this card is $5 and is repeatable B9 similar to B3 OUT OF STOCK

this card is $5 and i need to check if it is repeatable B10

this card is $5 and is unrepeatable B11


Christmas cards for sale

These are the Christmas cards that i currently have finished for sale prices as marked and are in Australian dollars.

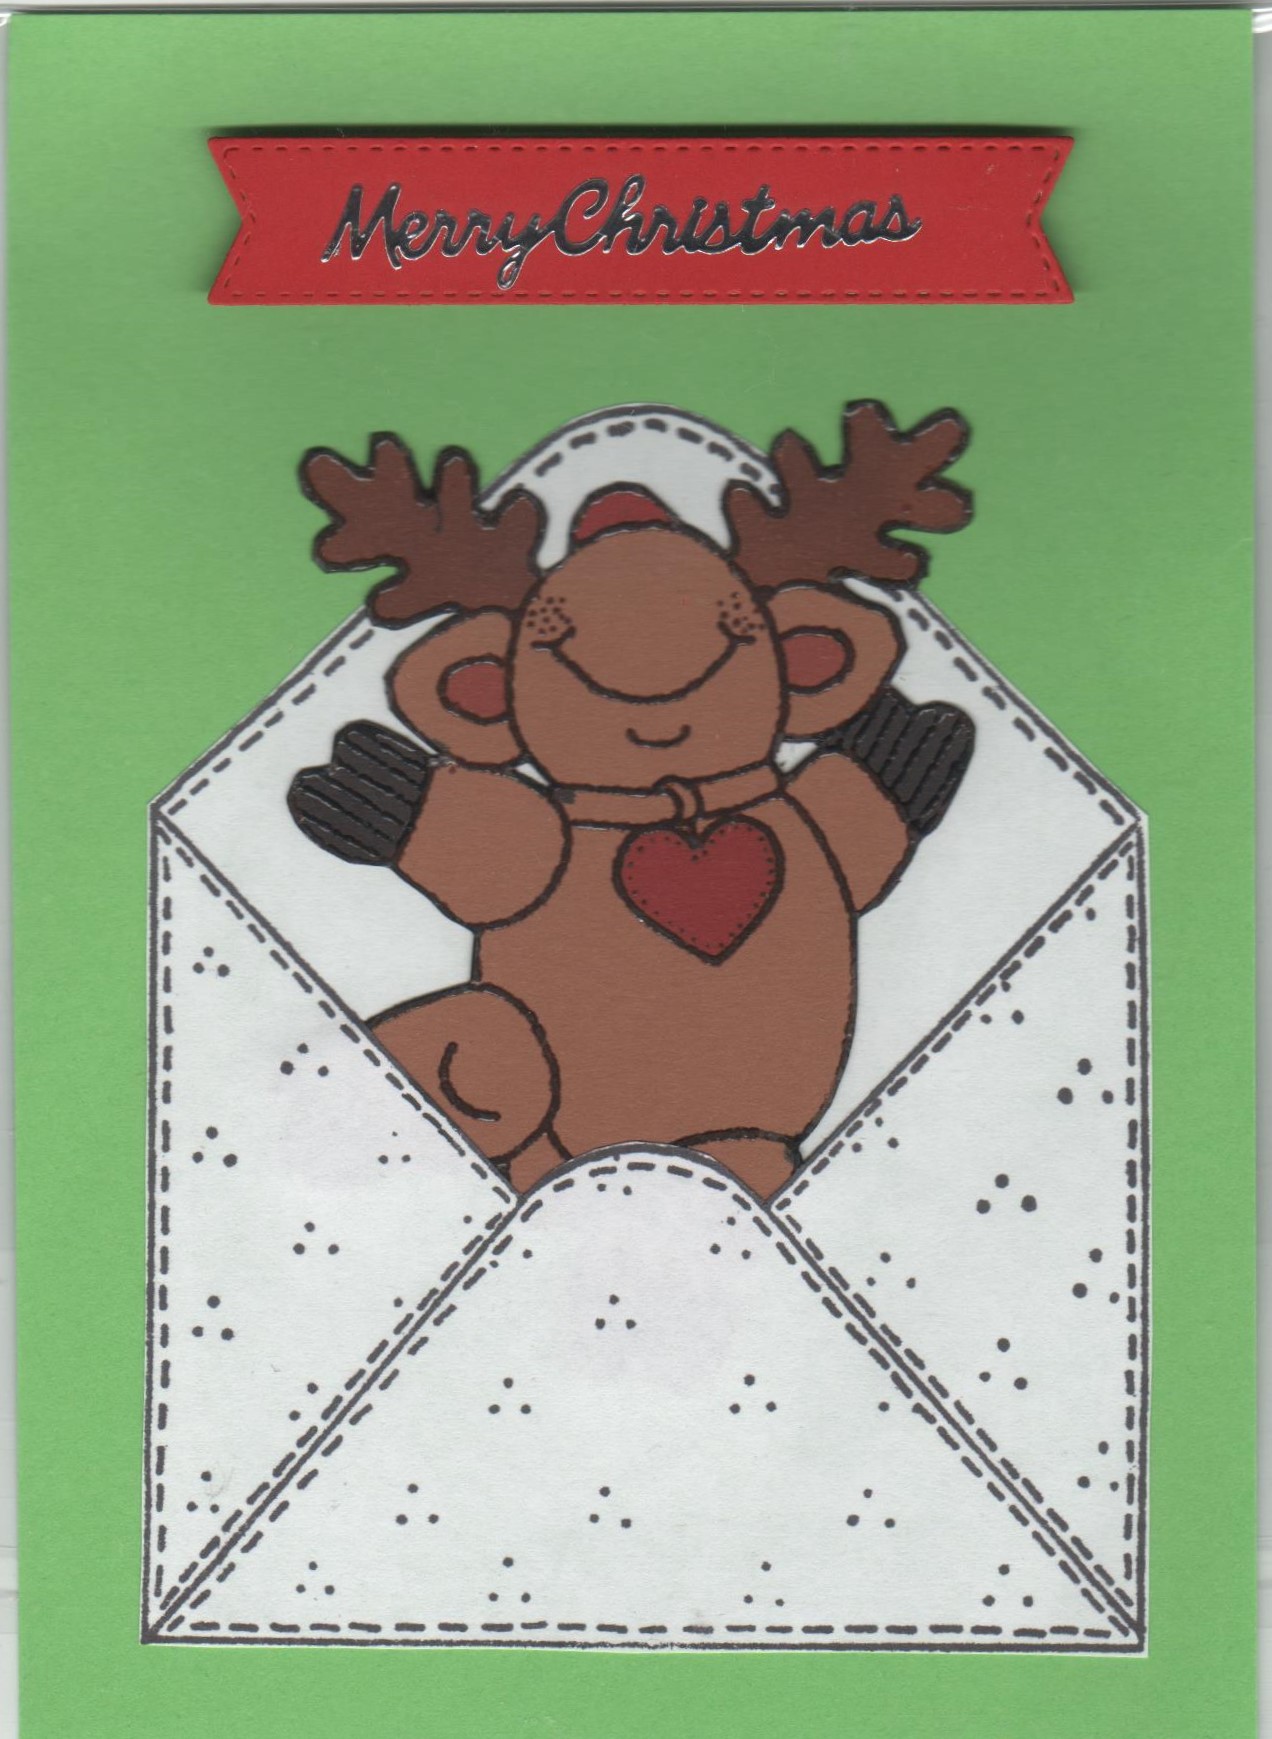
I have the ability to add a merry christmas pop up to cards that are vertical excluding gift cards as theyre too small. I cannot do a merry christmas pop up to horizontal cards that are already completed however i have many different christmas themed pop ups that can be made as a special order i have a snowman, christmas trees 4 different versions, I also have snow globes of various kinds including shaker and magic iris cards and others as well as box pop up cards or i can make cards without pop ups- just a cute scene or a simple paper tole. I even have a gingerbread card as well as santas workshop card too.

if you would like the pop up added to an already completed card this will cost an extra $2.50 so if the card is marked as $5 then with a pop up it will cost $7.50. this does not include postage. i can post it anywhere in the world. i can find out the postage if you would like me to. i only have ONE of each card. some cards are not repeatable meaning i am not able to make them again. Once they have been sold i will mark this next to the card. I am going to leave the pictures up so that people can see the cards i have made or to get ides about what i can make.

The christmas cards that are pop ups range in cost from about $10-$15 unless it is something extremely special (like a light up card then they are more). Please ask for quotes i am happy to tell you in advance what the cost is of a card

I have a category for micellaneous cards and some of these do not have any sentiment on them and you can add pretty much whatever you like i have many sentiments - sentiments are the words on the card for example happy birthday or merry christmas is a sentiment. can also computer generate a sentiment for the front of the card. You may find more cards that could be birthday cards in this category 

Inside of the card so far all of these cards is blank but (for no extra than what is marked) i will add any sentiment of your choosing. i have stickers, stamps or can computer generate a sentiment. 

Please note i make special cards which are pre order meaning you email and say i would like  a cat birthday card with a cake pop up or a happy birthday pop up i like bright colours. Thats an example. I can give you a price for what you are asking for and then we go from there. these cards are not in stock though and depending on my health and how many other orders have been placed it may take 4 to 6 weeks for me to make or it may take 2 it really depends how busy i am! So my preference is to be asked as far in advance as possible that way if something unforseen happens and life gets in the way i am not disappointing a customer! I much prefer to have more time on a card and the more time the more likely i am to do a special order I can always say it will take 6 and give it to you early if i complete it early.

These are the christmas cards that i currently have finished including the prices. Please take care when ordering to provide the exact code which is under the card for example 1A or 2A I have them up in a different order so that the cards are similar are under each other. Some cards are one of a kind and cannot be repeated because i dont have the same supplies or for other reasons so thats what "repeatable" or "Not repeatable" mean.

If a card says out of stock it means that i dont have it available straight away if it says - repeatable then it means it CAN be made again but there would be a wait for me to make it and it may or may not be made exactly as the picture depending on what products were used and what i have available

If it says unrepeatable and out of stock then it means i cannot make it again at this time. Im sure you will find something else you will like and somethings say i have things that are similar

Finally it is always possible to email and ask for a made to order card where you tell me what you would like and i do my best to make it with OR without a pop up!


card X1A $5 repeatable but too small for pop up.

$5 X2A not repeatable but can make similar cards

X9A $5 repeatable but too small for pop up


X10A $5 too small for pop up repeatable

X11A $5 I THINK this maybe repeatable i definitely have similar if not identical. can have pop up. OUT OF STOCK

X15A  $5  not repeatable but can make something similar. can have pop up.

X16 A not repeatable $5

X17A $5 I THINK i have something similar if not identical can have pop up


X19A $5 not repeatable can have pop up

X20 $5 cannot be repeated OUT OF STOCK


X21 $5 NOT repeatable 

X23 Not repeatable can have pop up $5


X24 $5 not repeatable 
X29 $5 not repeatable can have pop up

X30 $5 not repeatable can have pop up

X31 $5 not repeatable can have pop up

X32 $5 not repeatable


X33 $5 cannot be repeated can have pop up

X34 $5 not repeatable can have pop up


Monday, November 23, 2020

Update on fundraising for Mito Wish Upon a Star and Bridges and Pathways Institute SA

 Hello crafters 


it has been a long time since i have put anything on my blog and this post is totally different to the other posts so far - my husband has scanned all of the cards that i have in my "completed" box and i am going to put them up here for sale to support the two charities that i support when selling my cards - mito wish upon a star in the US and Bridges and Pathways Institute SA.

This post is literally just an update on what has changed and what is happening with the two charities i support through selling my cards. Basically i ONLY take the amount it costs me to make the card the rest is all donated to the charity Bridges and Pathways is a direct donation towards the mitochondrial research they are doing in Adelaide.

Mito Wish Upon a Star used to be like a secret santa where you got given a child with Mitochondrial Disease and they had some wishes of presents for christmas and between the sponsor and the parents i would sort out something and send it to them for me i believe i am the only person in Australia who did this - i have every year since it started except for 2012 when i was in hospital myself! Well now they have changed and they are now doing birthday presents for the kids/hospital stay parent pamper packs. So we have decided that my contribution will be my cards! i am thrilled that Mito Wish Upon a Star is letting me send over 20 cards at a time in my own time for health reasons and half will be for the kids birthdays and half will be encouragement type cards for the parents. I will be starting on them after Christmas and i cannot wait it will likely take me 12 to 18 months to make this many cards depending how detailed they are - depending how many requests i get for custom made cards. 

So there wont be a direct money donation however its gonna cost a lot to send the cards overseas so i intend to use the money raised to cover the postage cost of me sending the cards to MWUS! That way i am just donating my time and i can use the money that i have raised to sell other cards to cover the cost of the cards

I am also planning to update my facebook page as well with all of these cards so for all of you who follow it they will be going up really soon!

So the next few posts are all just the cards i have grouped them into categories for example christmas, birthday and micellaneous and i have put each category into a different post so theres not a million cards all on one post.

Things to remember:

Cost is the cost of the card plus postage (if required) 

Cost is in Australian dollars

All the portrait christmas cards can have a "merry christmas" pop up added for extra cost of $2 per card

Please use my email address erinmckenziechristensen@gmail.com to contact me. If i dont reply within a few days please resend the email as i dont want to miss your order.

currently my facebook page is Not updated but it soon will be with all of these cards and that page is 

www.facebook.com/erinshomemadecardsandcrafts

Thank you for your patience and understanding. 

When new cards are made they will be added to this blog and my facebook page so please come back often because there will be cards going up fairly regularly.

Also I make custom cards - and I intend after i have uploaded all of these cards to upload pictures of all of the cards ive made that dont already have tutorials just to upload a picture of them there will be pictures and videos as these cards are pop up or interactive in some way. these are my favourite style of cards.

To order a custom card all you need to do is provide some details in an email of what you would like this could be for example - a 21st birthday card for a female with a birthday cake 3 tier pop up or teacher thank you cards no pop up, or cat birthday card with a pop up or a shaker anniversary card. these cards range anywhere from $5 to $15 (or more if its super duper complicated). One thing to note due to health reasons i need to know when you need it by so you need to give a date of when its required and if its being posted that also needs to be factored in! Im saying that I need minimum about 4-6 weeks notice for ANY custom card so that is 4-6 weeks till the date you need the card including time to post it if thats required! But if it is a card that is completed - in the next few posts these are finished cards - unless you want me to add a pop up to it that will take sometime. Also i only take on what i am able to manage so if i have heaps of order for custom cards then i may say look i cant get it done thats why the earlier you tell me you want the card the better it is! i do my best to do everything im asked to do but due to health reasons i dont want to get sick doing something i love!

These will be easier once you know what i have already made. Some cards cannot be repeated because i do not have the same products but i maybe able to make something similar.

Lastly the cards listed in the next few posts are ONE card only each (unless theres 2 pictures of the same thing there will be 2 different numbers for them) but othewise there is only ONE card each this means i have to come back and delete or mark sold once they have been sold. I will do my very best to keep up!

I have some very exciting things coming in the new year including a you tube channel with video tutorials of some cards i have made this takes a lot of work but im hoping you will like them! I will be sure to let you know when its up and running it wont be until the new year.

thanks for reading my update on whats been happening 


Monday, August 20, 2018

Floating floor barn card

Hi today my card was taken from a Karen Burniston video which i will put at the end of the post. I completely changed the front of the card. This was a card I made for my aunty's 60th birthday and she lives on a small farm/property and has a menagerie of animals including sheep, chickens, cats, dogs. She loves sheep and cats but also all animals! I used the exact instructions provided in the video however I put more animals on the inside - I didnt use the cow cos my aunty doesnt have any cows!

So what i love about this card is that the barn door opens and there is hay inside! So cool. I also love how it makes an amazing scene.

As I said I did a completely different front of the card to Karen's card. I couldnt fit 3 sheep (I decided that there should be 2 white sheep and a black sheep too, a chicken and a dog and a cat on the inside! I am a cat person so it made sense to me that there would be a (barn) cat!! So thats what I put on the front of the card  -  a barn which opens and a cat! I used a stencil and distress inks to make the clouds

I put a barn that opens and inside i stamped "happy birthday to ewe" and I put whiskas the cat next to the barn and a 60 stickers at the top in the clouds


The inside of the card uses a technique called a floating floor this allows things to be taped to the card itself which make them stand up when the card opens and makes them fold flat when the card closes. It also has the hay pop stand and the barn pop stand dies (all Karen Burniston dies in this card are from Elizabeth craft designs and are retired now)

This is the inside of the card


Side on view of the card so you can see the floating floor and the animals, fence, barn and hay standing up


This is an angled view so you can see the sheep at the back a bit better


This is the link to the instuctions for how to make this card - I think I may of made my card slightly bigger in size but honestly I cannot remember the exact dimensions. It was just so I could fit all the animals in and also a message for the recipient but it wasnt a huge amount of difference. This is something i love about card making you can take someone's card and make it your own - put different animals change the colours or do a completely different front but similar inside or something along those lines. It helps to follow a video the first time when making a floating floor cos they're a bit tricky to get your head around but once you understand how to do it its not so hard after all!

Products used for this card

Dies Karen Burniston - whiskas the cat, Buster the dog, sheep (x 3 one in black 2 in white), chicken, outdoor edges (grass), barn pop up, hay pop up (all Elizabeth crafts designs and retired), countryscapes (Elizabeth craft designs) Susans Garden (fence)

Karen burniston stamps (elizabeth craft designs) "happy birthday to ewe" ( retired)

Stencil - grass and sky - Elizabeth craft designs

Large number stickers


Tuesday, August 14, 2018

Birthday pop up with faux metal look on front of card using perfect pearls

Hello today I have a relatively simple card with a technique in it from a jennifer mcguire video which I will link at the end of the post.
This is the front of the card


The front of the card I did about 5 x 6 inches and on a white piece of cardstock I used post it tape 1 inch wide to mask off about the width of the tape all the way around the card then in the middle I used grey distress ink and I followed the jennifer mcguire video to create a faux metal look using perfect pearl (pearl colour) powder. To do this is quite simple you put a heavy amount of ink in your choice of colour on using distress ink and a ink blending tool then while its still wet you put some of the perfect pearl powder (this comes in many colours and u can buy kits with 4 colours a clear ink pad and two brushes made by ranger. you dont need to use very much so the small container will last  a long time! So you put a small amount on where the ink is and then you use the brush (i did it over a coffee filter) and you brush it off the excess and put it back into the jar. Then you use a microfibre cloth and buff it and it will become all shiny and pearl like! Its really pretty in real life!

After it is dry (doesnt take very long) I ran it through using a embossing folder from we r memory keepers a 3D one. These are SO amazing in real life! Now some other companies sell these as well like crafters companion.
Then I used die cut happy birthday from karen burnistons happy birthday pop up set with double sided tape on the back so that it automatically becomes a sticker
On the inside I used this same die set  to create a pop up card. I used silver mirror board to cut two wavy pieces for the top and the bottom using one of the dies in I think it is the outdoor edges (ECD Karen Burniston retired) and also the happy birthday and stars both with double sided tape on the back so they are automatically stickers.
Then I cut a white katie label (karen burniston ECD retired) so theres a place to write a message.

There is a video at the end showing how to make this card but this pop up card needs an inside card which you die cut the pop up into and an outside card. In my case it also has an additional piece of white paper which is what is on the front. I have found it best to use thicker cardstock generally around 270gsm/100 pound for the die cut part and thinner cardstock for the outer card. But you can use whatever thickness you want to and make whatever size card you want to also.
Here is a vudeo of the card


Products used in this card

dies Karen Burniston - ECD Happy birthday pop up, katie label, outdoor edges (all retired)

Paper Blue, white, silver (mirror board)

other grey distress ink perfect pearl powder (pearl colour), double sided adhesive tape, we R memory keepers 3D embossing fold

Karen Burniston video how to use happy birthday pop up
This is a link to an explosion birthday card using the happy birthday pop up and though it is a different card base pretty much it shows you how to fold the die cut part to make the pop up as well as creating an explosion card. (please know this die is retired)

 https://www.youtube.com/watch?v=t5P0ebNYWrw&t=14s


Jennifer Mcguire video faux metal look created using perfect pearl powder -This video shows you how to create the silver metal look that i did on the front of this card. Though Jennifer McGuire did not do pop up cards with this technique there is no reason why you cant. You can also do 1, 2 or more colours and also use colours other than the pearl colour to achieve a different look.

https://www.youtube.com/watch?v=rRI9znNZsyg&t=4s

Monday, August 13, 2018

Wedding anniversary pop up card

Hi everyone welcome back to my blog I hope you like the card I have for you today.

Todays card is a pop up wedding anniversary using Karen Burnistons cake pop up die and also the cake trims and numbers set.
On the front of the card I took a piece of white cardstock 5 x 6 inch and I put the petite flourish stencil on it and used gold ink and stencilled it. Then I used a Elizabeth Craft Designs (ECD) scalloped oval and I die cut out the centre of it so there was room for the cake and the birds.
I stuck the stencilled piece onto a 5 x 6 inch side fold card base with doubled sided tape and then in the centre I stuck on the cake and the two birds (from Lawn fawn Happy wedding) which I had stamped, heat embossed and also coloured in and die cut out using the coordinating dies. I stamped Happy anniversary (from lawn fawn happy happy happy set) onto a banner (from lawn fawn bannertastic) and then I stuck the banner at the top of the card. Generally for colouring in I use zig brushables markers but because i wanted part of the cake to be gol I actually used a gold sharpie marker as well as the brushables. I am not able to use copic markers or any other type of alcohol marker because of breathing issues due to my disabilities so I use inks that dont contain alcohol and do not smell. The zig brushables dont have a smell!


Front of card                                                  Inside of card


I also used Elizabeth Craft Designs -Suzanne Cannon's happy anniversary die and I also used Karen Burniston's petite flourish (Elizabeth Craft designs/retired) to stencil the front and inside of the card
stencil and a katie label (retired) for somewhere to write message.
These photos show the inside


 This is how the card folds flat to go into an envelope


On the inside of the card I made two panels slightly smaller than the inside of the card which i stencilled with the petite flourish stencil

I made up the cake with white cardstock following Karen Burniston's instruction video (found at the end of the post) I put gold trim round each level of the cake in gold mirror board and I put red heart trim around the bottom of the cake as well from red mirror board. I ran the gold through with my rubber embossing mat after it was cut to get the dry embossing feature on it as well

I stuck the stencilled panels on each side of the cardbase then I put the cake with the trim in the middle and the red hearts around it on the card base added the happy anniversary cut from red glitter cardstock and added the katie label for somewhere to write the message. I added the number 13 to to the top of the cake as it was for a 13th wedding anniversary.


Video of the card being opened.


Karen Burniston's video how to put the cake pop up together can be found here:

https://www.youtube.com/watch?v=SEOBLR2GjHQ&t=589s

Products used to make this card

Dies Karen Burniston cake pop up die, cake trims, numbers, ECD Suzanne Cannon Happy anniversary ECD - Scalloped oval

stamps and coordinating dies - Lawn fawn Happy Wedding, Bannertastic

Stamps - Lawn fawn Happy Happy Happy

Paper - white 270 gam/100 pound cardstock, red and gold mirror board, red glitter cardstock,

Other ECD Karen burniston petite flourish stencil, versafine onyx black ink pad, clear embossing powder, embossing gun, die machine (cut n boss), zig brushables, gold sharpie marker


Sunday, August 12, 2018

Mothers day flower pot pop up card

Hi sorry i have not posted in ages!

I am back and I have some cards i made recently to share with you.

Todays cards are two Mothers day cards. Both of them use Karen burniston flower pot pop up card (i have the Elizabeth craft designs die set, but she has re-released this set so it is available again!) Some of the cards use the original flower that was from the Elizabeth craft designs set and some use the flowers from the re-release, the flower, leaves and bee (which is what is different between the new set and the retired set) are available as a seperate set as well so that those people who bought the original dont need to buy the whole set again!

Both of the cards start with a 5 x 6 inch white side fold card base. To make the card base start with a rectangle that is 10 x 6 inches and score at 5 inches.

On the front of the first card I have used an altenew stamp layering set called Build a flower- Rose. I made a number of these cards in 4 different colours using inks from altenew for the rose. I used a technique called masking so that the leaves look like they are behind the rose. The video at the end from Jennifer Mcguire makes a different card using the same stamp set and shows you how to do masking if you have never seen it before. I used masking paper for this technique.

 I also used the Happy Happy Happy set from lawn fawn to stamp Happy Mother's Day on the front of the card using versafine onyx black ink. Then I heat embossed it with clear embossing powder.

The inside of the first design also uses the flower turnabout stamp from concord and 9th both on the flower pot itself and on the edges as well. I used a combination of lawn fawn, hero arts, and distress Oxide inks for the turnabout stamp.

 I also used the Elizabeth craft designs- karen burniston die called paris edges on the inside of the card (retired)

I used the concord and 9th turnabout stamp and once i had stamped it out with 4 colours plus the leaves I cut this piece into half making sure it was 6 inches long (small amount of white on edge) I placed this on the edge of the card on each side of the card.

This is a special stamp because you can use up to 4 colours of ink for the flowers plus green for the leaves with the same stamp. Its quite easy to use once you get the hang of it especially if you have a MISTI tool. I recently got given a MISTI as a present and it is the best tool i have for stamping and i highly recommend it! There is a video at the end showing how to use the turnabout stamp from concord and 9th in case you have never used this type of stamp before.

I also cut a sizzix label die in white cardstock and used it as a place for the recipient to write their message.

I made 4 of these cards with the rose on the front in Teal (teal and blues on inside), Blue (purple on inside), red and yellow. I use Nuvo drops om the front of each of the card

I put a plain coloured rectangle to cover the holes made by the pop up die on the back of the card.
At the end of this post i will put some links of some videos showing how to use the altenew and concord and 9th stamps and how to use the die set (from these companies).


Front of teal card
Inside Overhead view

 Close up of the flower pot - this uses the original flowers

 Side view
video of this card


Photos of blue card

 Inside of the blue card (purple)
This uses the new flowers


Photos of red card
 Front of card

Inside of card (this one is also red on the inside) overhead view

inside of red card
 Front of yellow card


inside of card (violent on inside)


inside of card side view


Products used for first card

Dies  karen Burniston/ECD - Flower pot pop up die, paris edges die

Stamps Lawn fawn happy Happy Happy Altenew - Layering stamp set Build a flower-rose, Concord and 9th flower turnabout stamp

Inks Altenew -I used 5 sets from altenew (cubes) - Summer afternoon (yellow card), Red Sunset (red card), sea shore (teal), deep blue seas (blue), tropical forest (green for leaves)   On the inside I used various lawn fawn hero arts and distress Oxide inks for the turnabout stamp - unfortunately I did not write down the exact colours used but really any dye inks/distress oxide will work for this.

Paper White 270 gsm/100 pound Teal, red,

other Versafine Onyx black ink, clear embossing powder, Nuvo drops, MISTI


For the second design i used an A4 rose embossing folder by crafters companion which came with my die machine (cut n boss) and I embossed a 5 x 6 piece of white cardstock (270gsm/100 pound) then i used pink and blue gelatos to colour in the roses.

On the inside I used the same flower pot pop up die set as the first card but instead of the concord and 9th stamp I used pink and blue distress inks and I stencilled a couple of pieces of white cardstock using the Elizabeth craft designs - karen burniston flower stencil (retired). I cut two rectangle pieces to put down the edge of each side of the carcd I still used the paris edges die the same as above.I also die cut the layering pieces from the pop up set from the stencilled cardstock and stuck it on the flower pot.
As above i die cut a white sizzix label for somewhere to write the message.

I put a plain coloured rectangle to cover the holes made by the pop up die on the back of the card.

Front of card


Inside of card
 Side view
 Card standing up partially closed
 Card standing up open


Video of 2nd card


I hope you liked these two cards i have made. I will be back with another post soon with another card.


Dies  karen Burniston/ECD - Flower pot pop up die, paris edges die

Stamps Lawn fawn happy Happy Happy

Inks - various distress inks in pinks and blues. (please note for this card i used traditional distress inks but for the first card i used distress oxide inks) I like and use both but i dont have as many colours in the distress oxides thats one reason for this why i used the distress inks

Paper White 270 gsm/100 pound

other Versafine Onyx black ink, clear embossing powder, Nuvo drops, MISTI, karen burniston flower stencil (retired)


Videos mentioned above

How to use concord and 9th turnabout stamps - All turnabout stamps need to be "set up" once only and once they are and you have your jig (a 6 x 6 square piece of card with diagonal lines drawn corner to corner) and your MISTI you are set to go.

Video 1 - tips for ALL turnabout stamps by concord and 9th
https://www.youtube.com/watch?v=zLg65DWL6aE&t=3s

Video 2 A thank you card using the flower turnabout stamp
https://www.youtube.com/watch?v=OOX8m_m7M3s

Video 3 This is a video by Justine Hovey which shows you exactly how to set up a turnabout stamp (she is doing with another turnabout stamp but the process she's doing is exactly the same and there is a picture on the packaging of the flower stamp that you will need to follow similar to this video for the hello stamp.There is also more information at concord and 9th website if you need it.
https://www.youtube.com/watch?v=3aMqZH2ecL4

Jennifer Mcguire Spotlight stamp layering  This video show you how to do masking and how to use the Altenew Build a Flower- Rose layering stamp it is a completely different card design to mine but also very pretty.
https://www.youtube.com/watch?v=e4r8ujv4HmA&t=621s

How to use the flower pop up card - Karen Burniston
Elizabeth craft designs version - this has the original type of flowers and leaves and also the butterfly - i didnt use the butterfly this time but i have in past cards ive made.
https://www.youtube.com/watch?v=o4jstIg3Oi8&t=632s

How to use the flower pop up card - Karen Burniston
New die set This one has the new shaped leaves and flowers and also the bee - remember you can get the new leaves, flowers and bee seperately if you wish to.
https://www.youtube.com/watch?v=PYGMHlQuOvc&t=707s